It is not uncommon to encounter typos in documentation for Julia packages. Fixing them as you happen to encounter them is simple for packages you own, but for other people's packages this is not so easy as (1) you can't make the commits directly and (2) you don't want to just spam them with pull requests fixing every typo individually when you see them. Moreover, especially for larger packages, it is just not possible to find all typos yourself. A great tool for optimising this process is github-spellcheck, from tbroadley on GitHub, which checks a given GitHub repository for mistakes and will automatically create a pull request to fix them.
Installing github-spellcheck
github-spellcheck requires that you have Git, Node.js, and NPM all installed. In the instructions that follow, and in the rest of this article since github-spellcheck is a command line tool, we are running commands in the terminal, which on Windows is opened with the Windows Key + R and then entering cmd (alternatively, you can enter wt).
-
To install Git, you can follow the instructions here. You can verify that you have installed it correctly by seeing if
git versionreports any information:
C:\Users\User>git version git version 2.39.1.windows.1 -
You can install Node.js from here. Similarly to Git, you can verify that you have installed it correctly by seeing
node -v:
C:\Users\User>node -v v18.16.0 -
From the above installation of Node.js, you should also now have NPM, as the installer contains the NPM package manager. To check this, do
npm -v:
C:\Users\User>npm -v
9.5.1
If you still do not have NPM, review the instructions here.
Now with Git, Node.js, and NPM all correctly installed, github-spellcheck can be installed. To install it, simply run
C:\Users\User>npm install --global github-spellcheck-cli
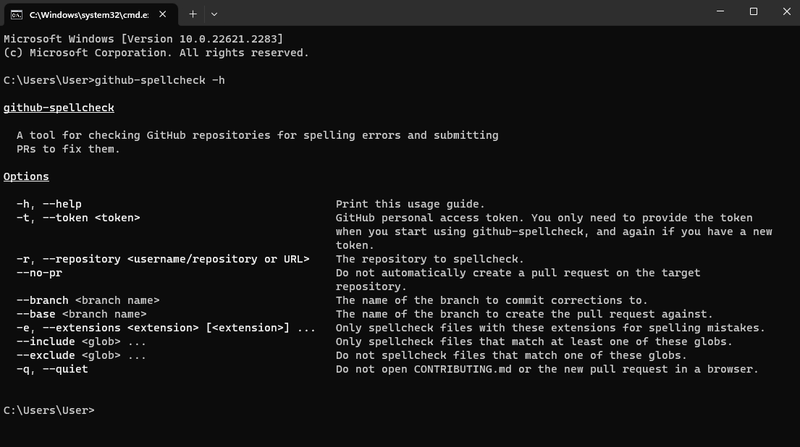
which will automatically install the tool. If you have installed it correctly, you can run github-spellcheck -h to see if the help prints, as below.
Using github-spellcheck for the first time
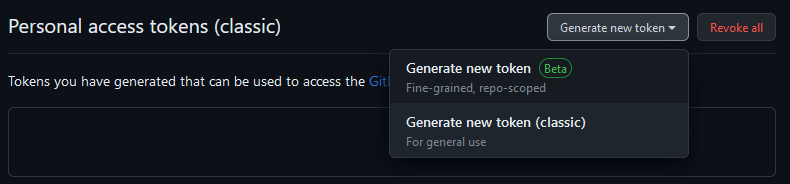
The first time you use github-spellcheck, you need to provide it certain permissions for your GitHub account. This is done using either a GitHub credential manager or an access token. Here, we will use an access token, following the instructions here. Go to https://github.com/settings/tokens and click Generate new token followed by Generate new token (classic).
On the page that you are taken to, make a note of what the token is for, e.g. Spellcheck CLI, and only click on the repo scope. You can set the expiration date as you please, for example 7 days; you will need to generate another token if the token has expired. Once you are done, scroll to the bottom of the page to generate token, and copy-paste the token that you are given.
WARNING: You should treat this token as you would any other password. Do not share or display it anywhere. Some good recommendations about keeping the tokens secure are given here.
To now set this token up for github-spellcheck, use github-spellcheck -t GITHUB_TOKEN, where GITHUB_TOKEN is the long token you copied above:
C:\Users\User>github-spellcheck -t GITHUB_TOKEN
Saved your GitHub token.
You are now ready to use github-spellcheck.
Fixing typos in a repository
Let us now use github-spellcheck to address typos in a GitHub repository. Here, the repository for NaturalNeighbours.jl will be used as a reference. (This is a package which I already have write access to, but you can use it for other packages, e.g. I have used it to create this PR in Manopt.jl, where I have no write access.)
WARNING: After you use this tool once for a repository, if you try and use it again for the same repository it will error at the end due to this issue, and you will lose all the changes you have made with no way to recover them. To allow yourself to use the tool again for the same repository, you need to go to ~/.github-spellcheck/UserName/ and delete the folder corresponding to the package. For example, after running the examples below, I then manually delete the folder C:\Users\User\.github-spellcheck\DanielVandH\NaturalNeighbours.jl. You also want to delete the branch corresponding to the created pull request (as the GitHub pull request will prompt you to do after the pull request has been merged).
To run the tool on the repository https://github.com/DanielVandH/NaturalNeighbours.jl, we want to make sure we also include any docstrings. By default, github-spellcheck only searches for files ending in .md or .txt, so we need to tell it to also search for .jl files. The command for this is
github-spellcheck -r DanielVandH/NaturalNeighbours.jl -e md txt jl
which shows the output:
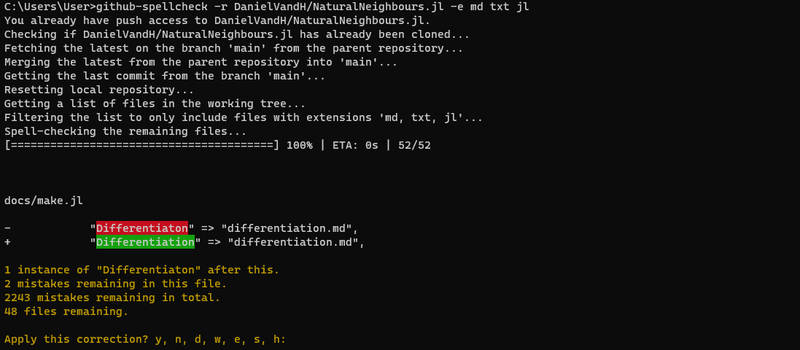
The main part of this output of interest is at the bottom. The tool is showing a typo highlighted in red, in this case we have a typo Differentiaton in docs/make.jl, and provides a recommendation Differentiation. There are 7 instructions we can give in response to this, as indicated by y, n, d, w, e, s, h at the bottom. The meaning of each of these instructions is:
-
y: Yes, apply this correction. -
n: No, do not apply this correction. -
d: Delete this word. This can be useful for duplicate words, e.g. if you havethe thethen it will delete the secondthe. -
w: Add this typo to a whitelist, located at~/.github-spellcheck/whitelist.txt, so that the tool will no longer apply any suggestions to this phrase. In this case, this would tell the tool to never prompt us about the wordDifferentiatonagain. -
e: Edit the correction suggested, replacing it with a different word. -
s: Skip this correction and any other corrections in this file, in this casedocs/make.jl. -
h: Print the help for these commands.
In this case, we of course want to replace Differentiaton by Differentiaton, so we input y:
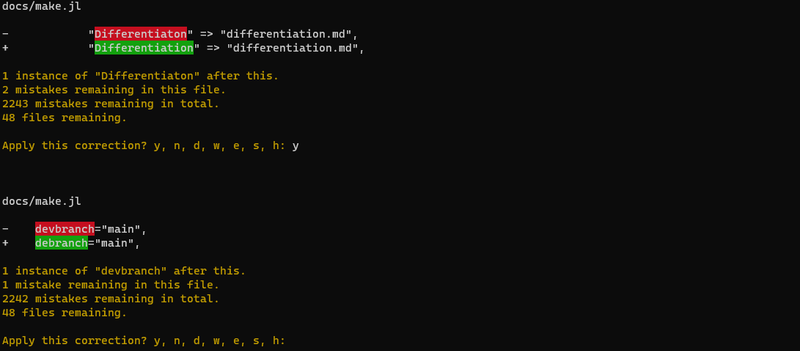
With the first correction made, the tool goes onto the next correction. Here, it suggests that we replace devbranch by debranch, which is not what we want. We therefore input w so that devbranch is whitelisted and never asked about again. This whitelisting is also nice in case you make corrections against other repositories, since the tool will save these whitelisted words.
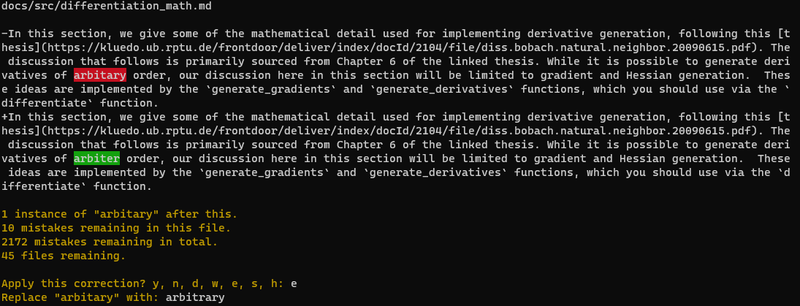
Continuing with making changes, you may encounter suggestions that don't really fit what you want. For example, arbitary will get replaced with arbiter instead of arbitrary. In this case, you should input e and then input the word you want to use:
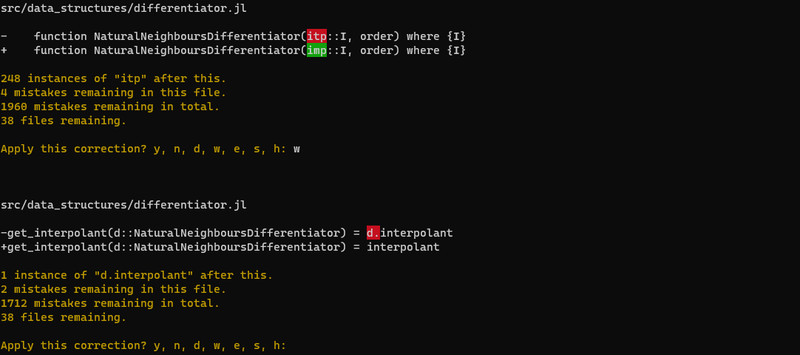
One unfortunate part about this process applied to the .jl files is that it will also try and apply corrections to code. There is no way in github-spellcheck currently to apply e.g. a regex filter to these steps, so you will just need to keep whitelisting words until you find actual corrections to be made. For example, below it thinks that d.interpolant should become interpolant, which would not be a good suggestion as it will break the code.
Once you are done making all the changes, the tool will list out all the changes made and ask if you are ready to create a pull request with these corrections.
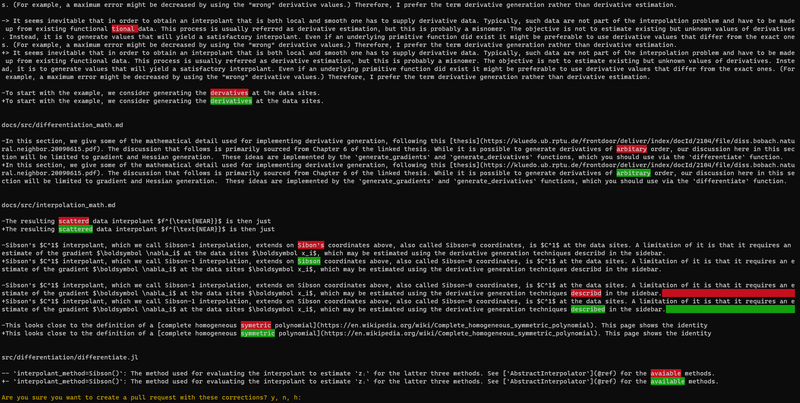
If you are satisfied with the changes, input y.
WARNING: There is no confirmation made in the browser after you input y. It will just open up an already-created pull request.
The pull request corresponding to the changes made to NaturalNeighbours.jl in this article is given here. The changes can then be reviewed and merged as with any normal pull request.
Conclusion
The command line tool github-spellcheck is a great way for fixing typos in packages. You do have to manually step through each change, which allows you better control over what changes are made, and the parsing of jl files includes actual code, but the whitelisting features of github-spellcheck helps to minimise these headaches. Happy spellchecking!

Top comments (0)